

Most HTPC-Cases are…mostly crap. Either they have a form-factor, which isn’t usable at all in common living-room-configurations or they are missing some major features you would expect from a HTPC.
Whatever, this shall not be the topic here. Instead we’re fetching a case, which features most of our requirements, and add a ‚useful‘ LCD-setup to it.
Introduction
(If you have your HTPC Setup already completed with LCDd running and just seeking for the XBMC/Kodi integration, you might want to skip some lines here…)
First of: Forget about cases with integrated LCDs. They are usually crap. On the one hand they are ridiculously expensive for no reason, and on the other hand they only offer a very limited set of features and mostly require some specific windows-software. which never gets updated, and is will be usually incompatible with the next release of Windows, even if you tend to use the Microsoft-OS for a mediacenter-computer.

Big Digits on a 40×2-Display
Instead, why not go the originally inteded ‚default‘ way? Long, long time ago there was a LCD-driver-chipset which was cheap, widely available, able to drive character-display with up to 80 characters in almost every configuration of lines and quickly become the de-facto-standard for displays in industry-applications. I am of couse talking about the Hitachi HD44780-Chipset. While no longer produced by Hitachi itself, tons of compatible chipsets are out there. Just grep Ebay for HD44780, and you will see they’re very affordable. Therefore you are able to get this easy-to-use and well-documented displays beginning at 2$. Much less than the extra value a case with a much more crappy display would cost you. The only thing you should care about is to get one with backlight, because this is optional, but most displays nowadays do have integrated backlight.
Build your HTPC
I got myself a neat case (and i really do not remember where i got this nor what model it is), which was really cheap and cost me something around 30 euros, which is of course quite affordable compared to the heavily overpriced HTPC cases.
The PC itself consists of a Zotac µITX-ATOM/ION (1st gen ION) Board with an Intel Atom ION 330 Processor, 2G ram and a ~80G SSD – Yes, i know it is meanwhile quite old, but it is still a <10W-TDP-Board and still a LOT faster than any Raspberry PI…and it does it’s job very well for over 5 years by now. A huge advantage of this Zotac-ION-boards is, that they are supplied by an external PSU, like it is common for notebooks. This saves space in the case, because we dont need a PSU inside the case. Just get yourself a nvidia-driver with VDPAU-Support, and this tiny chipset can play 1080p without any flaws (which was not that common 5-6 Years ago for low-TDP-µITX-Systems!).
Software consists of an Ubuntu 14.04. (need to get this upgraded soon…) and Kodi. The files I play come from my Server via NFS and SMB.
Get a Display
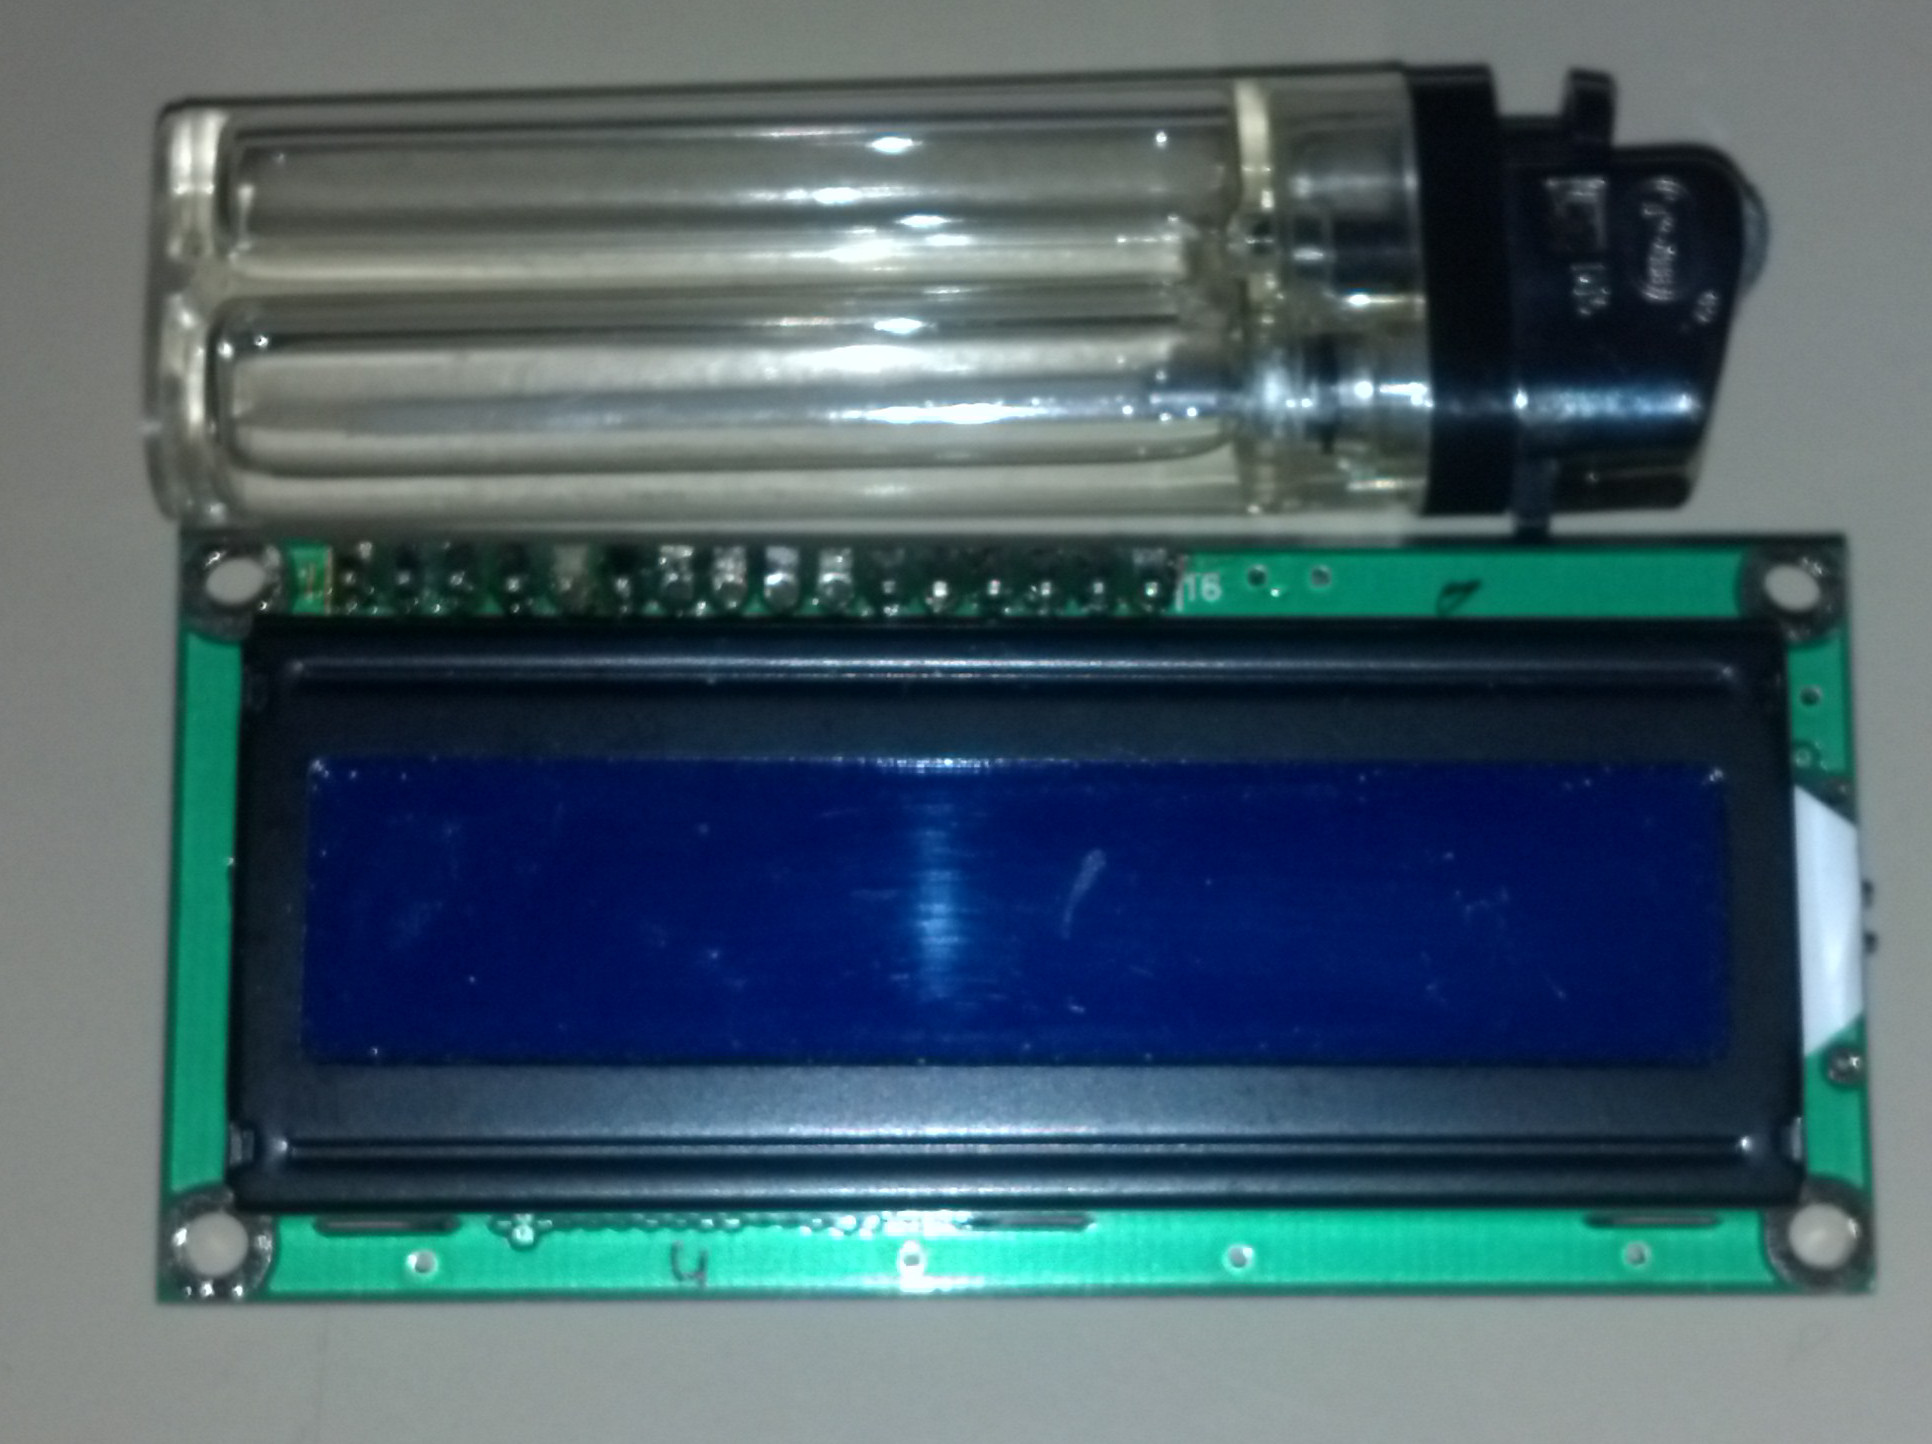
16×2-LCD – size comparison
Next comes the display. While there are many color/backlight-color variations available, there are some defaults regarding the size. They are given in the following sheme : 20×4 or 2004 , in this case meaning „4 lines with 20 chars each„. Most common sizes are 16×2, 16×4, 20×2 and 20×4. But much more interesting are the more uncommon sizes, especially the 40×2 one. This size is perfect for HTPCs, because many cases are (more or less) flat, but wide enought to fit a 40×2-Display in (and, to be honest: Really noone wants to read titles like „The Lord of the Rings – The Fellowship of the Ring“ or „Harry Potter and the Deathly Hallows – Part 1“ scrolling on a diaplay which is 16 caracters wide, right?).
You can choose any configuration and size you want, but as i said, the 2×40-configuration is really useful for flat cases, but unfortunately you may have to keep an eye out for this a while, because they are not that common, so if you spot one you like on Ebay, better get it before it’s gone, because the availability differs from time to time.

I²C-Board for direct display assembly (1-row-version)
You shall also keep in mind, that you most likely need a piece of extra hardware to interface the display. You can either interface the display directly if you have any kind of GPIO-Pins like on a raspberry pi (or arduino, or similar), use (or make) an I²C-Adapter Board (costs around 5 Bucks) if you have the possibility to interface I²C on your machine somewhere or try to get (or make) an LCD2USB-Adapter. The last ones are small PCBs, which use an atmel to interface the display and make it available via USB. This Board is OpenSource, so usually not available from any professional manufacturer.
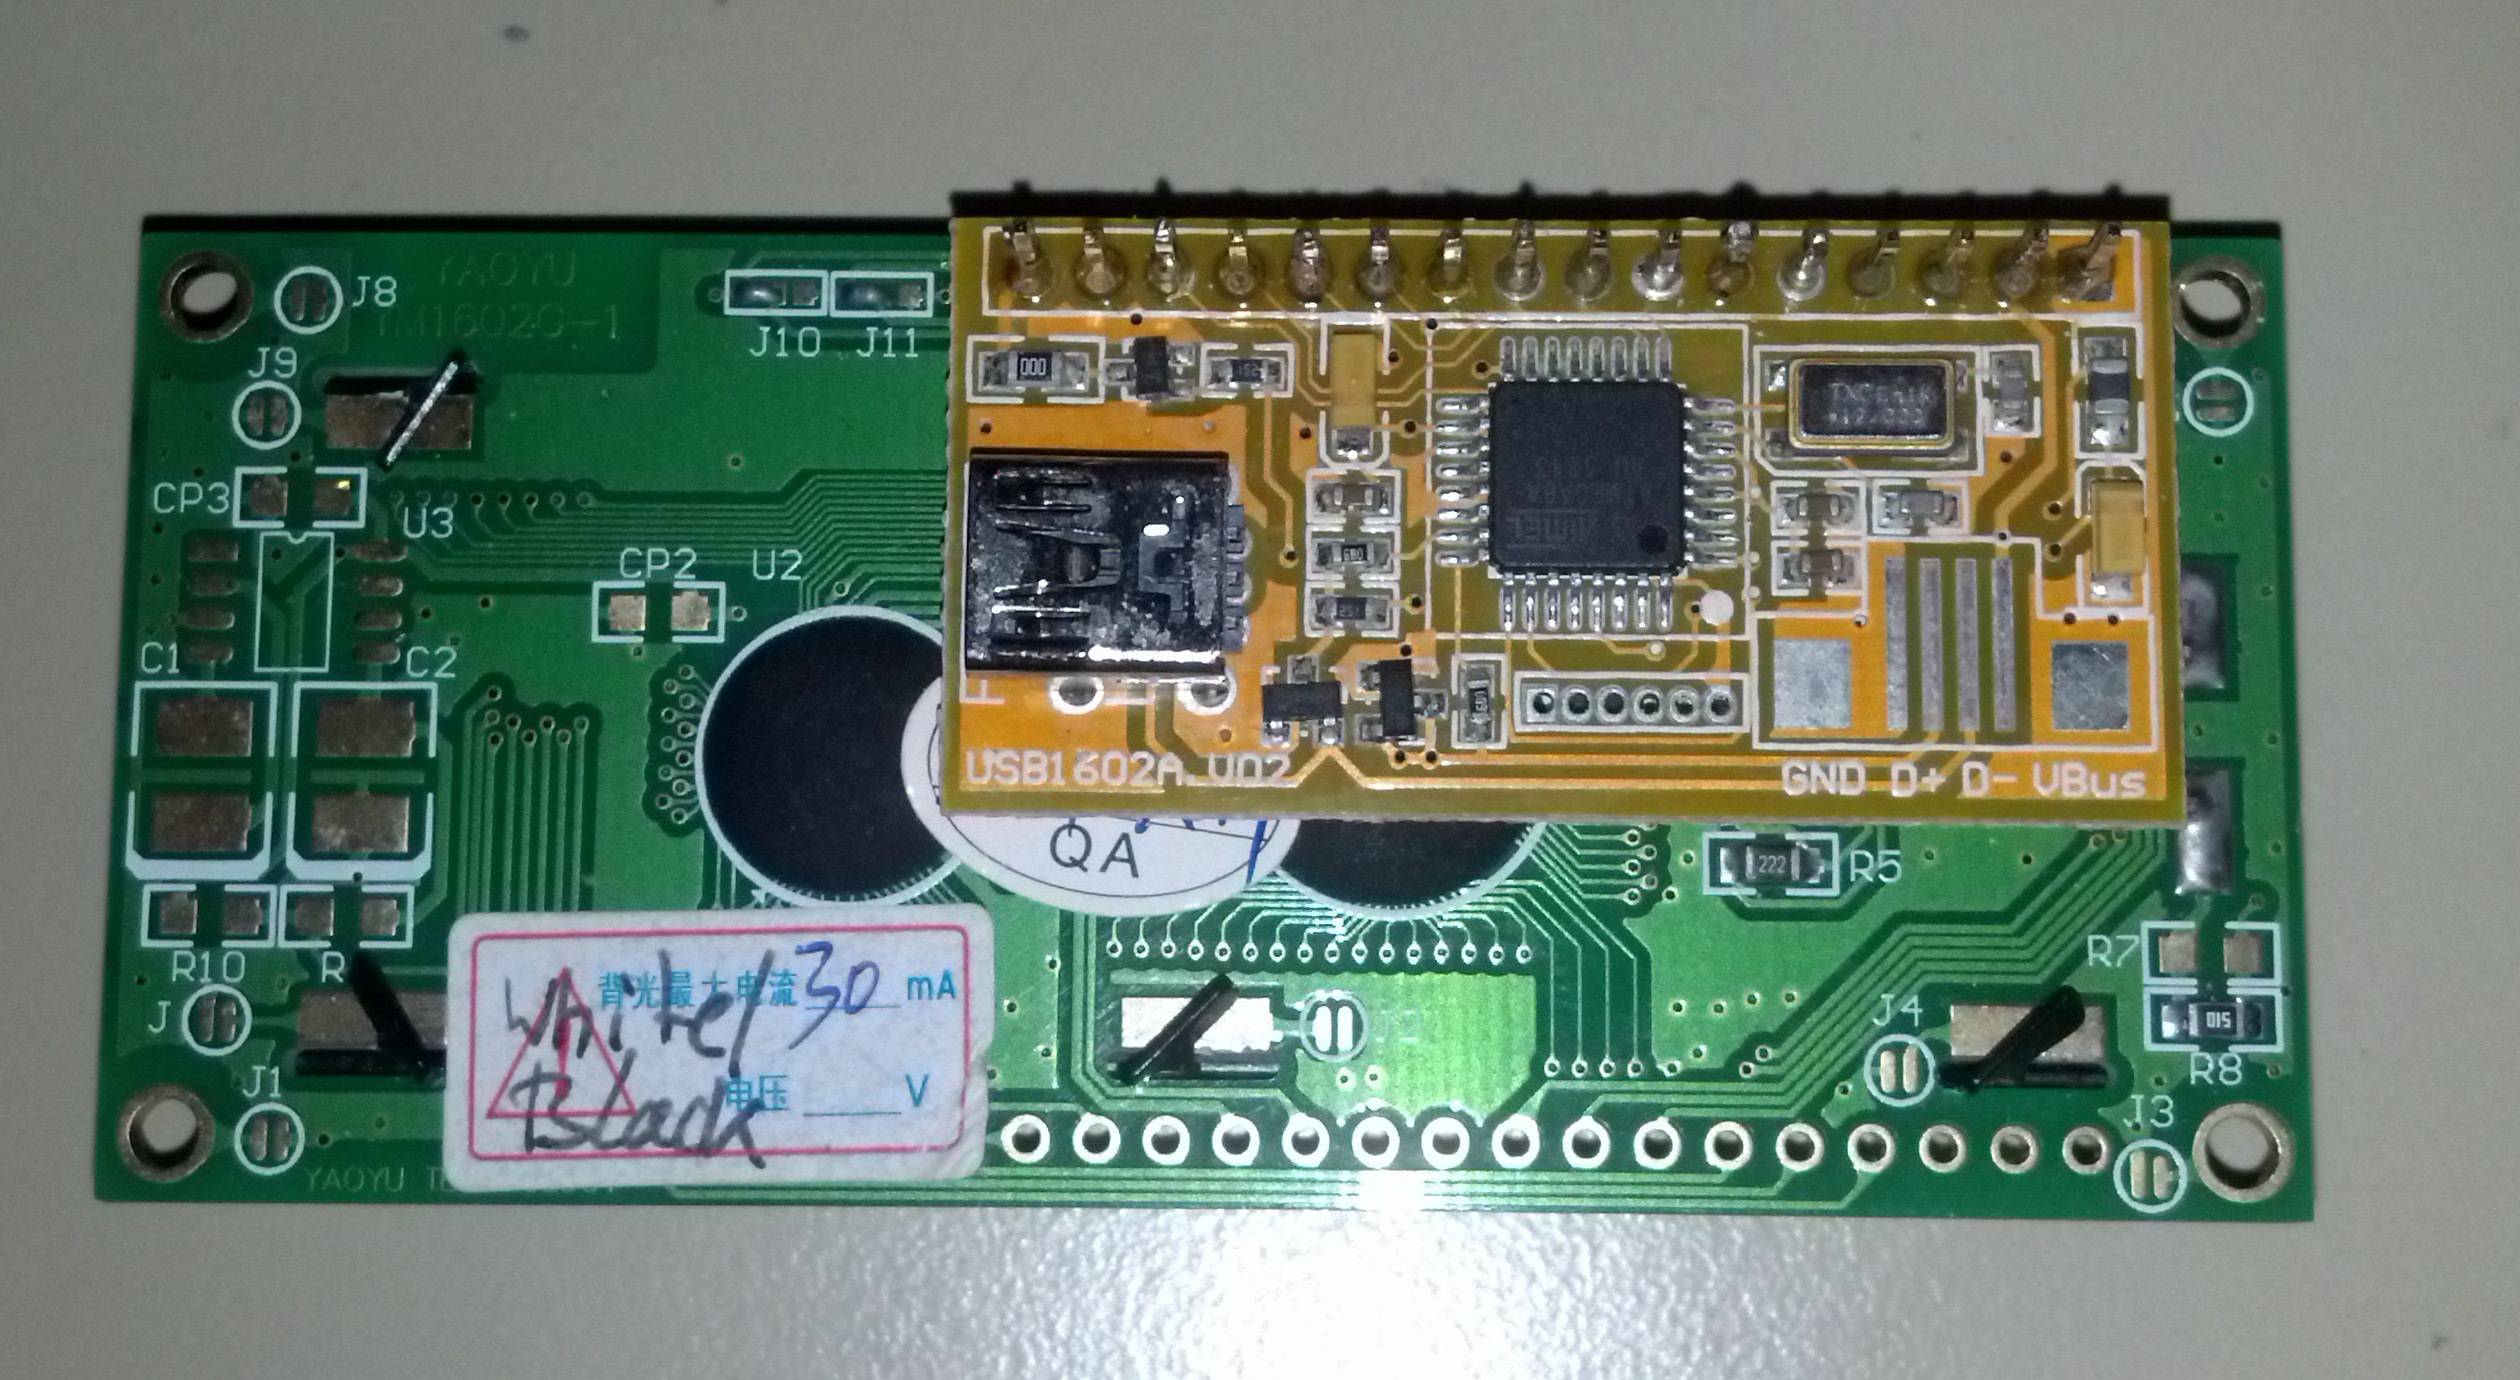
LCD2USB-board assembled to a 16×2 LCD (1-row-version)
But sometimes a batch of this can be seen and purchased via chinese ebay traders (but keep in mind, that the 40×4 displays use a 2-pin-row-layout at the side instead of a 1×16-pin-line which most displays use, if you got the wrong adapter, you have to use flexible wires instead of pins to connect them together). If you see one of these: get them, they’re rare! The LCD2USB-Project can be found here.
Alternatively the display can be directly interfaced via the LTP-port, but they are rarely seen on modern computers.
I was in total luck while buying a display, because I managed to find a blue/white 40×2 display with an LCD2USB-Adapter preassembled for around 20 bucks. And it also came with a 4-pin-wire soldered to the USB-Port, so no work at all, just plugged it it on one of the internal USB-ports onboard as it was intended anyways.
Get the stuff together
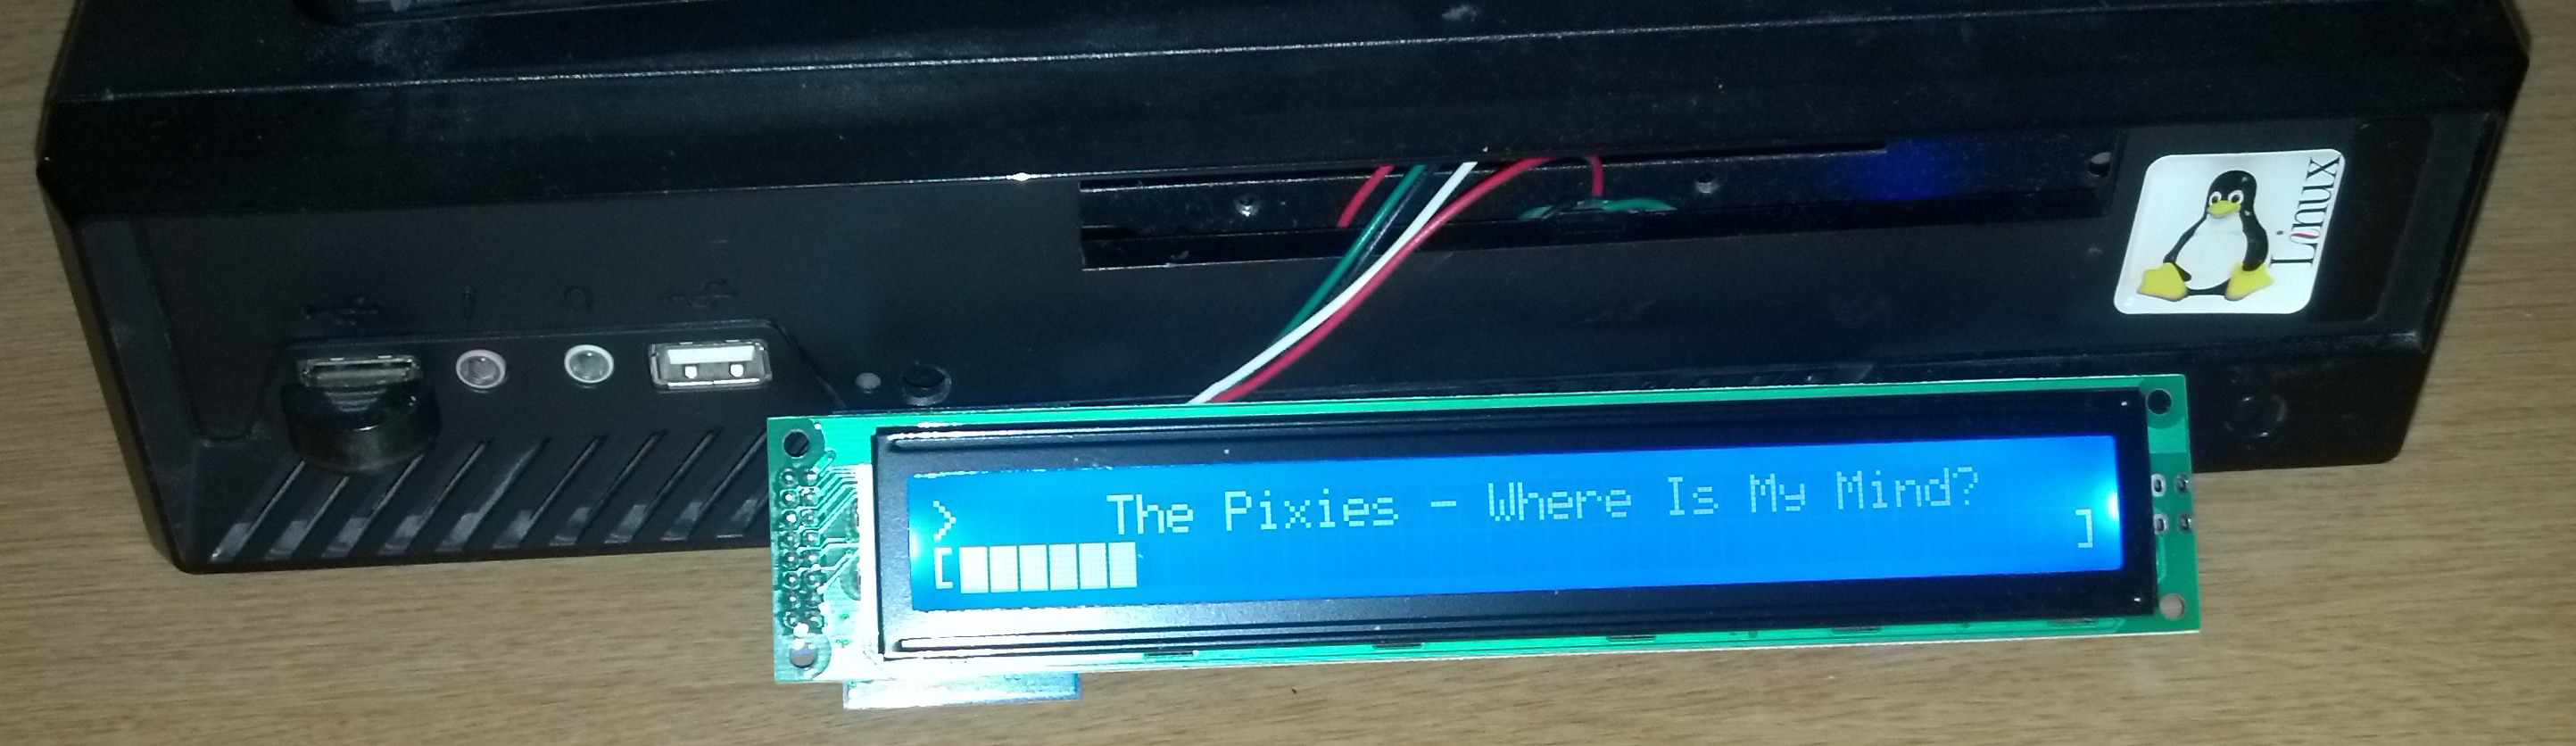
40×2-Display before fitting into the case
The case of course was not able to fit the display without some modifications, so i got myself a hacksaw and a file, and began to fit it in (no, I’m just kidding, I drawed a matching hole in inkscape, exported it to DXF and made a clean cutout with a CNC-mill, but you are likely stuck to a saw and a file because you don’t have access to a CNC-mill… ).
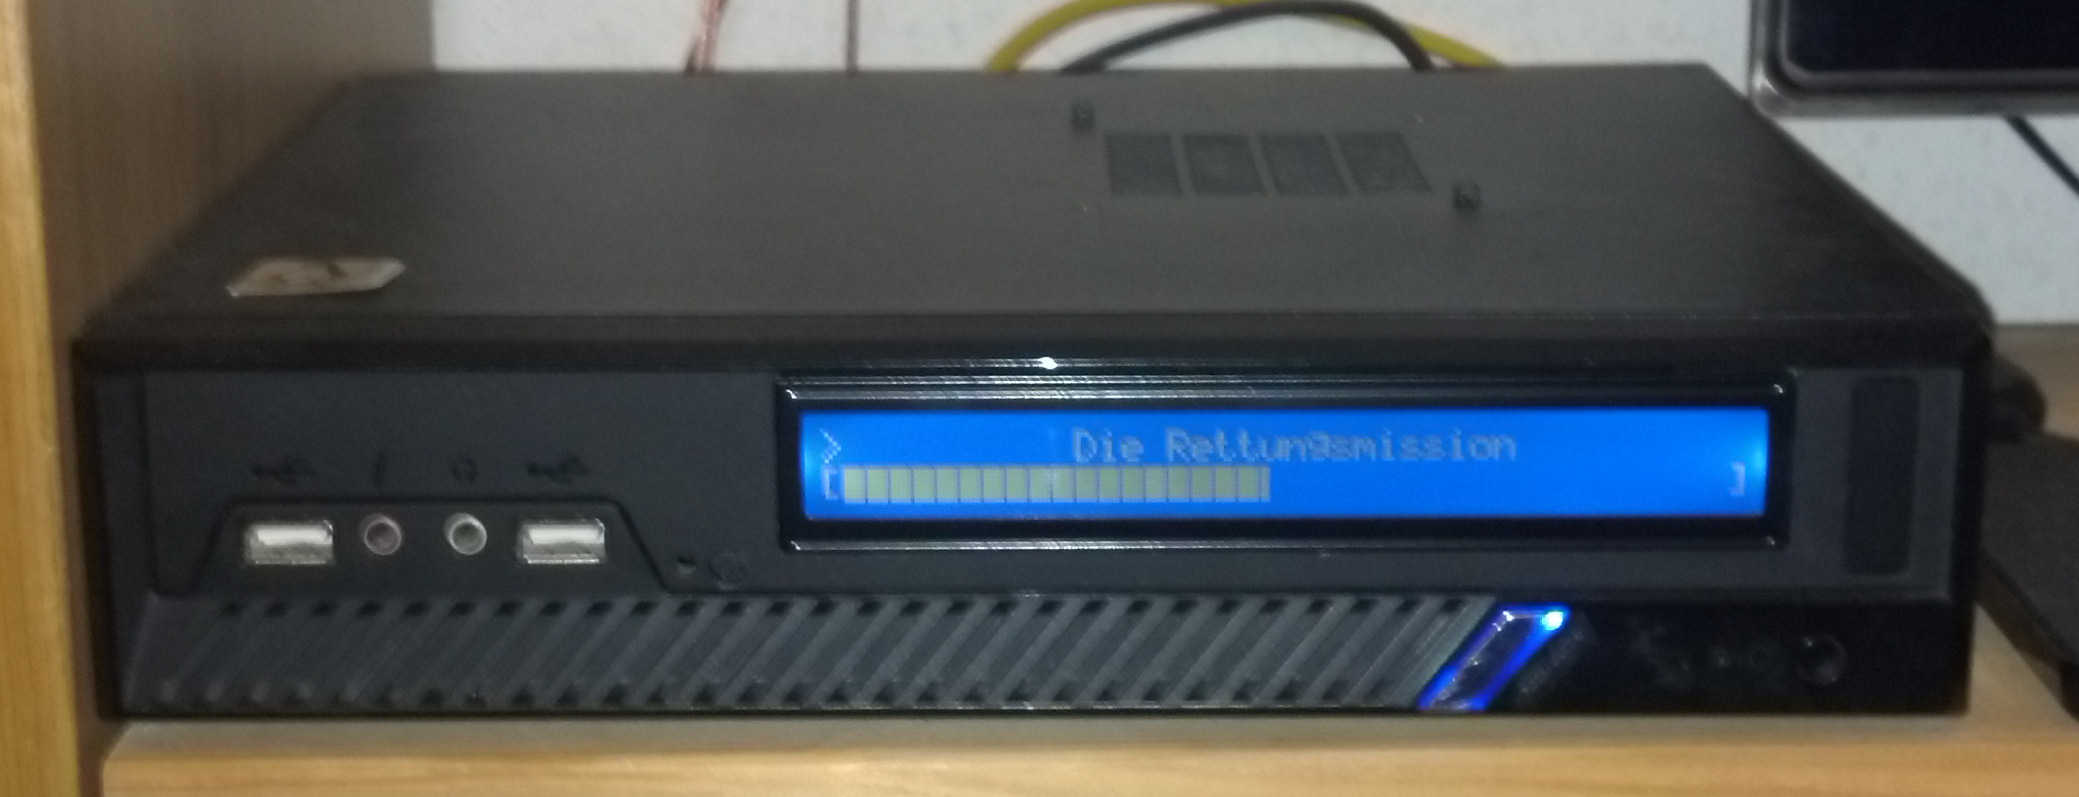
Display fitted in the Case
Once fitted, the display was secured with hot-glue. I did not want to see screw-heads in the front of the case, so this was the easiest.
Software Setup
Interfacing the display on software side is really easy, on Windows you can use tools like LCDsmartie or on Linux you usually use LCDproc or LCD4Linux. However, the Kodi-Addon (on Linux) uses LCDproc. Depending on your distribution, you may have to compile LCDproc by yourself , because your distro-version is lacking the right drivers for your display, but this is well documented on the LCDproc-website. I will further explain the configuration using LCDproc.
After installing LCDproc (and eventually missing drivers), a sample config could be look like this:
|
1 2 3 4 5 6 7 8 9 10 11 12 13 14 15 16 17 18 19 20 21 22 23 24 25 26 27 28 29 30 31 32 33 34 35 |
xbmc@xbmc:~$ cat /etc/LCDd.conf #config [server] DriverPath=/usr/lib/i386-linux-gnu/lcdproc/ Driver=hd44780 Bind=127.0.0.1 Port=13666 User=nobody Hello=" XBMC" Hello=" ... Loading, please wait ..." GoodBye=" XBMC" GoodBye=" ... power-cycle ..." # Sets the default time in seconds to displays a screen. WaitTime=4 ServerScreen=blank # backlight for its own screens (only). [default: open; legal: off, open, on] Backlight=open TitleSpeed=1 [menu] [hd44780] ConnectionType=lcd2usb Contrast=750 Brightness=500 OffBrightness=0 Backlight=yes Size=40x2 # [default: hd44780_default; legal: hd44780_default, hd44780_euro, # ea_ks0073, sed1278f_0b, hd44780_koi8_r ] CharMap=hd44780_default DelayBus=true # EOF |
The LCDd.conf is usually very long, because of the many supported drivers. I stripped it down to the neccessary values.
Due to the fact that already a „lcd2usb“-value as connection type exists, this is all we have to do here, if we use one of the lcd2usb-adapters (which I highly recommend). Also mind the driver path. Your display drivers shall go there of course. Restart LCDd and see if the display shows something. If yes, your general setup is done. The rest relies to your personal taste.
LCDproc uses Clients (applications which use a display provided by a network-daemon provided by LCDproc to interface displays) to display Screens (of which you can define multiple and e.G. switch between them). In our case a XBMC/Kodi-Addon acts as Client for our display and draws it’s output to the LCD.
KODI Setup
First place to go is the advancedsettings.xml inside ~/.kodi/userdata/ . I prefer to place some values here, which shall not be overwritten by anything else, and also a bit of the LCD-config:
|
1 2 3 4 5 6 7 8 9 10 11 12 13 14 15 16 17 18 19 20 21 22 23 24 25 |
xbmc@xbmc:~/.kodi/userdata$ cat advancedsettings.xml <advancedsettings> <tvshowmatching> <regexp>S([0-9]+)[\\/]([0-9]+)[^\\/]*</regexp> <regexp>S[\._ ]([0-9]+)[\\/]([0-9]+)[^\\/]*</regexp> <regexp>Staffel[\._ ]([0-9]+)[\\/]([0-9]+)[^\\/]*</regexp> <regexp>Season[\._ ]([0-9]+)[\\/]([0-9]+)[^\\/]*</regexp> <regexp>[\._ \-]()([0-9]+)(-[0-9]+)?</regexp> </tvshowmatching> <lcd> <heartbeat>false</heartbeat> <scrolldelay>3</scrolldelay> <rows>2</rows> <columns>40</columns> </lcd> <useddsfanart>true</useddsfanart> <cputempcommand>cputemp</cputempcommand> <gputempcommand>gputemp</gputempcommand> <samba> <clienttimeout>30</clienttimeout> </samba> <network> <disableipv6>false</disableipv6> </network> </advancedsettings> |
The important part here is of course inside the <lcd>-tag, the values are self-explanatory. Next, and much more important is the LCD.xml in the same folder. Here is mine as example:
|
1 2 3 4 5 6 7 8 9 10 11 12 13 14 15 16 17 18 19 20 21 22 23 24 25 26 27 28 29 30 31 32 33 34 35 |
xbmc@xbmc:~/.kodi/userdata$ cat LCD.xml <lcd> <disableonplay></disableonplay> <disableonplaydelay>0</disableonplaydelay> <scrollseparator>+++</scrollseparator> <progressbarsurroundings>on</progressbarsurroundings> <allowemptylines>off</allowemptylines> <extrabar1>progress</extrabar1> <extrabar2>volume</extrabar2> <centerbigdigits>on</centerbigdigits> <navigation> <line>$INFO[System.CurrentWindow] -> $INFO[System.CurrentControl]</line> <line>$INFO[LCD.AlignCenter] $INFO[System.Time(HH:MM:SS)] - $INFO[System.Date(dd MMM yyyy)]</line> </navigation> <music> <line>$INFO[LCD.PlayIcon] $INFO[LCD.AlignCenter] $INFO[MusicPlayer.Artist] - $INFO[MusicPlayer.Title]</line> <line>$INFO[LCD.ProgressBar]</line> </music> <video> <line>$INFO[LCD.AlignCenter] $INFO[Player.Title]</line> <line>$INFO[LCD.ProgressBar]</line> </video> <tvshow> <line>$INFO[LCD.AlignCenter] $INFO[VideoPlayer.TVShowTitle] - $INFO[Player.Title]</line> <line>$INFO[LCD.ProgressBar]</line> </tvshow> <general> <line>XBMC running...</line> <line>$INFO[LCD.AlignCenter] $INFO[System.Time(HH:MM:SS)] - $INFO[System.Date(dd MMM yyyy)]</line> </general> <screensaver> <line>$INFO[LCD.TimeWide21]</line> <line>$INFO[LCD.TimeWide22]</line> </screensaver> </lcd> |
While most of the LCD-config is self-explanatory, i will explain some of the variables to make a useful config.
- progressbarsurroundings This adds square brackes to progressbars. Looks a lot nice than without.
- extrabar$N defines, what the $Nth progressbar in a screen displays. I usually let display the progress of an element beeing played.
- centerbigdigits self explanatory. LCD.AlignCenter does not work for the big digits. more on them later.
- $INFO[System.CurrentWindow] -> $INFO[System.CurrentControl] I put this in the navigation and general sections. While navigating through menus, this shows the actual hilighted element as well as it’s parent item, e.G. Music -> Rammstein, or Settings -> Addons.
- scrollseparator When an entry is so long, that it scrolls, this will be put behind the line before it begins again.
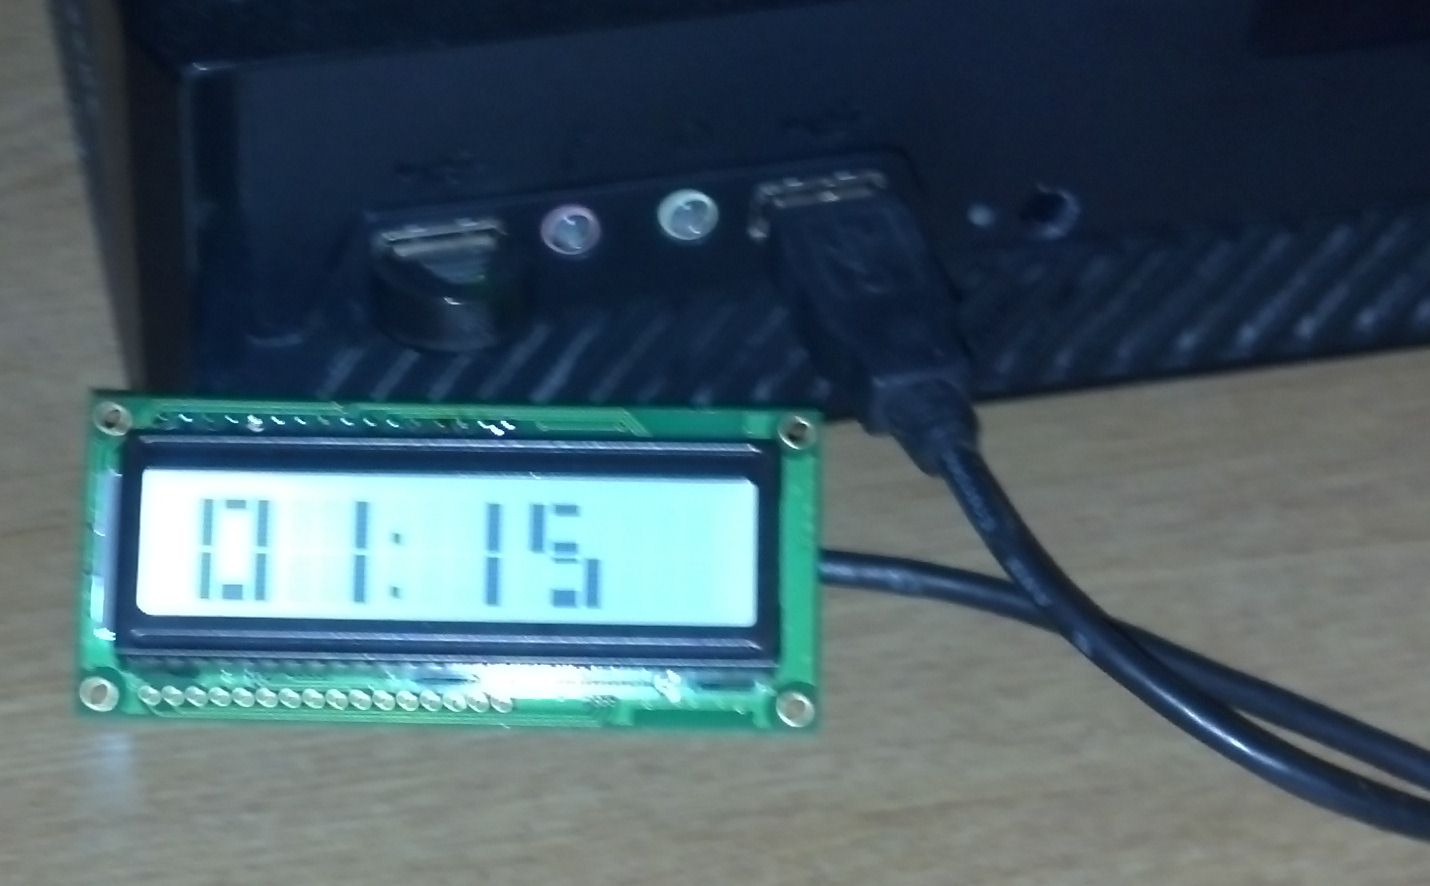
- $INFO[LCD.TimeWide$X$Y] I use this for screensaver, so when the system is idle. Assume your display have 2 lines, then you need TimeWide21 in row 1 and TimeWide22 in row 2. On a 4-Line Display you need TimeWide41,42,43 and 44 when using all 4 lines for the big digits. Once you understand how it works, it’s easy. This displays big digits filling more than one row, in my case displaying the actual time. Valid for X and Y are 1,2,3,4, while 1 is rather useless for X of course.
- [LCD.PlayIcon] shows something like „>“ or „||“ as the first character in the line, depending on if something is „playing“, „paused“ or whatever.
Umlauts encoding issue
Big Digits
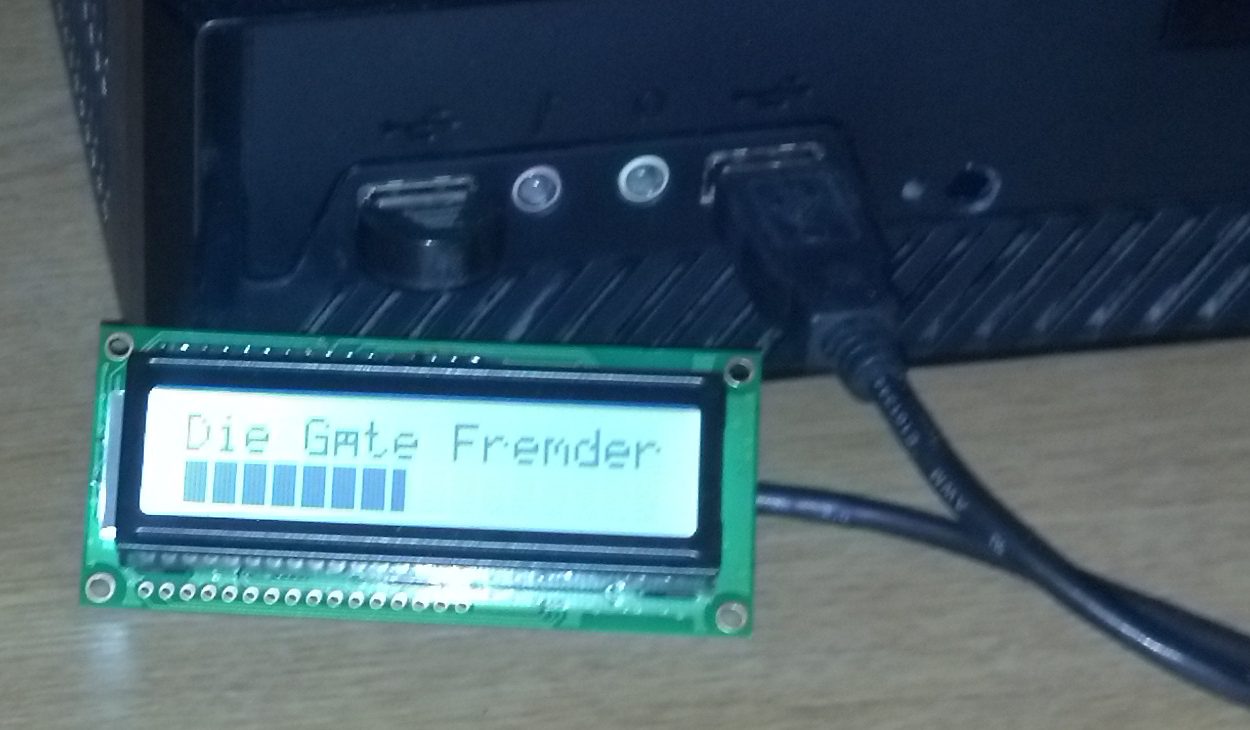
In general I can say, whenever i’m navigating or staying in some menu it shows me „where i am“ in the first line and time/date in the second. Whenever i am playing something, it shows what exactly is playing in line 1 and a progressbar in line 2. When idling and the screensaver (just dim) is activated after 3 mins of idling, some big digits spanning over 2 lines, showing the time are visible.
One thing is left, installing the XBMC LCDproc addon inside Kodi (yes also in Kodi it is called XBMC… , dont know why, maybe there are 2 identical addons with different names, but i use this since a few years, so maybe it is different in your setup). Most values can be taken as they are, my prefered settings are
- scroll-text speed: 7
- scroll-mode: continuous/endless (marquee style)
- refresh-rate: 1Hz
- show additional icons
- no dimming in any mode

Completed setup running for years by now
Congratulation, your configuration is complete. Enjoy your upgraded living-room appliance, doing what you want to, not what the manufacturer want to let you do with your stuff.
Conclusion
I do not want to miss my „widescreen“-LCD on my HTPC anymore. if you – like me – perfer to leave your low-TDP-HTPC-device always on, then you can achieve an interesting dual-use as clock, room-thermometer, rss-feeder, whatever.. I prefer the clock, because of it’s simplicity.
If you find this displays odd and boring, you might want to try one of this more fancier VFD or OLED displays, or why not build yourself a dot-matrix display out of LEDs, which runs with LCDproc? …but this of course relies onto the personal taste.
You are unable to find a simple, affordable HTPC-Case without many bullshit-addons? You might want to have a look at the cases from inter-tech, they imho have some neat cases available.
Liked this article? Leave a comment.
-zeus
Danke! Hat mich inspiriert und mir geholfen 😀